Friday, February 19, 2010

Spring Goodies and Raspberry Cookie Bars

Happy Friday, friends!   I don’t know about some of you, but I’m tired of all of this snow that we’ve been getting!!  A couple of weeks ago, our local weatherman pointed out that, as of that day, we had only 34” inches of snow fall compared to last year’s total of 70”.  Well . . . I think we more than made up for the deficit!  I don’t know what the exact total is, but I’m sure we went well over the mark with all of this snow we’ve been getting.  The only good thing about this kind of weather is that my hubby is home a lot.  He has his own concrete business and so this is a slow time in the year for him, which is also the time of year when most of our inside projects get done.

For a long time, we’ve wanted to replace our kitchen cupboards.  I have a very small galley kitchen with minimal storage space so we figured we could gain more space by replacing the standard 30” high wall cupboards with 42” to-the-ceiling cupboards.  We went to Home Depot and Lowes and got prices ranging between $5,000-$6,000!!   What?!!!  Cupboards are that much for my tiny little kitchen?!!!   We were kind of figuring $2,000-$3,000 and I wasn’t even really happy with any of the styles that they had.  I wanted inset doors without any overlay, but all of the styles had an overlay.  We then went to a local independent cabinet company.  Chuck figured that they would have better prices since there wasn’t any “middle man” to go through.  By then I had already decided that I wanted to paint the cupboards a charcoal grayish color – picking out one of the colors from my slate floor tile (which isn’t as brightly colored as shown in the pic- it’s much more subdued).  They had a couple of styles like what I was looking for, so we got prices for unfinished and finished cupboards.  Okay are you ready for this?!!  Unfinished were a little over $7,000 and finished were over $8,000!!  Whoa!!!  A little too much for me!  So we decided to make them ourselves.  And let me tell you, it’s been a very long, time consuming process!!

IMG_2416

IMG_2417

After Chuck cut and sanded all of the pieces for the base of the wall cabinets, I had the fun of staining each of the inside pieces and then applied 2 coats of polyurethane with sanding in between coats before he assembled them.  I figured it would be a lot easier doing them that way than trying to get in the corners after they were put together.  My Rec room was wall-to-wall with cupboard pieces!

I chose a color by Ralph Lauren called “Cottage Hill” (which Home Depot has since discontinued).  It’s kind of hard to describe. . .depending on the lighting sometimes it looks gray, sometimes an olive green, and sometimes a brownish color.  I haven’t had a chance to take a picture of it yet, but I’ll try to post one later. I don’t know if you’ll be able to get the true color or not.

I had made many sample boards before I finally came up with a finish that I liked.  I’ve decided to just lightly sand around the edges.  I don’t want them “too prim”, just simple. . . no stain, no heavy sanding, just simple.  So far, I’ve given everything two coats of paint and today I’m going to apply a sealer which will reduce the amount of scratching to the paint when I lightly sand the edges.  The final step will be to apply plain paste wax and then they should be ready to install.

Unfortunately, that won’t happen until after we remove all of the brick on the one side of the kitchen and replace the drywall, which Chuck is starting on that today.  I love the look of the brick, but the color doesn’t match my color scheme.  Eventually, we’ll install new brick.  But, for now, it’s just going to be primed and painted.  The kitchen will get painted the same color as the Living room and Dining room that I had painted right before Thanksgiving.

IMG_2413 

It’ll be a long, slow process to finish the kitchen.  Our countertops are concrete, which are also going to be replaced.  They’ll still be concrete, which I absolutely love, but our base cabinets are about 3” longer than the wall cabinets near the refrigerator.  We’ll eventually replace all of the appliances with stainless steel and want to get a side-by-side refrigerator.  The one we have now is only 23 cubic feet due to the base cabinets being too long.  We need to have the sides finished in stainless steel since that is what you see most of when you look into the kitchen.  Our options for a fridge in that size with those requirements are much slimmer than those for a 25 cubic foot one, so we’re reconfiguring the cabinets from the dishwasher down to the refrigerator to accommodate for a larger fridge.

As you can tell from the pictures, the lighting is horrible, so we’re installing under-the-cabinet lighting.  Yayyy!!  We’re also replacing the recessed light over the sink with this new tin-punched one that was just delivered Wednesday.  It’s kind of funny…I  found this light online from a place called “Rustic Log Lighting”.  It was only $87.00 with shipping included.  The company is based in Montana and when I called to place the order, the gentleman said that the light would be shipped from a company in Pennsylvania.  When it came, the return address was “Irvin’s Country Tinware”.   I was so excited!  I love Irvin’s, but some of their things are a little pricey.   I’m thinking, “Great!  I could have just ordered from them in the first place and saved a couple of bucks”.  But, I looked up the light in their catalog and they were asking $79.99 and an additional $13.99 for shipping and handling.  That totals $93.98.  I only paid $87.00, so I saved $6.98!!  Can’t beat that!!

IMG_2409

This kitchen remodel is snowballing into another project.  The cabinets that we are taking out are going to be installed down stairs in the kitchenette area of our Rec room.   After Chuck is done removing the brick and replacing the drywall in the kitchen today, he’s going to tear out the downstairs cupboards and the drywall there, which also needs to be replaced.  He figures if he’s mudding walls, he may as well do them both at the same time.  Needless to say, I’m going to have a huge mess in my home for the next couple of days!!

♥ ♥ ♥ ♥ ♥ ♥ ♥ ♥ ♥ ♥ ♥ ♥ ♥ ♥ ♥ ♥ ♥ ♥ ♥ ♥ ♥ ♥ ♥ ♥ ♥ ♥ ♥

In between waiting for stain and varnish to dry, I was able to get a couple of spring craft projects done this past week.  I actually had sewn these bunnies last year, but never did anything more with them.  I just stuffed and tea-dyed them and stitched their eyes and noses.

IMG_2423  

I made this guy  by adapting a pattern that I had bought from Pattermart for a snowman that I absolutely love!  I just made a new head pattern and added ears.  Click here if you’d like to purchase the snowman pattern.  I also made the carrot and stuffed it with Sweet Annie.

IMG_2408

I’m also working on a horse from a pattern by T.F.C.  Folkart.   All I have left to do is apply the flax for his mane and tail, which just came in the mail yesterday, but I haven’t had a chance to finish it yet.

♥ ♥ ♥ ♥ ♥ ♥ ♥ ♥ ♥ ♥ ♥ ♥ ♥ ♥ ♥ ♥ ♥ ♥ ♥ ♥ ♥ ♥ ♥ ♥ ♥ ♥

A couple of weeks ago, Chuck and I stopped in at Goodwill. . . I don’t know why - I never find anything great like a lot of you do. . .but every once in a while, I figure “what the heck” and stop in.  Chuck found this dresser and wants me to “work my magic” on it.  lol  He wants to replace the one in our room that he uses for his clothes with this larger one.  (I claimed all of the stepback cupboard for myself!)  I haven’t started on it yet. . .it’s still sitting in my Rec room waiting to be made over.  Someday . . . .

IMG_2385  

♥ ♥ ♥ ♥ ♥ ♥ ♥ ♥ ♥ ♥ ♥ ♥ ♥ ♥ ♥ ♥ ♥ ♥ ♥ ♥ ♥ ♥ ♥ ♥ ♥ ♥ ♥

In participating in Colleen’s (And Baby Makes Five) Kitchen Weekly Recipe swap, I wanted to share this awesome recipe for Raspberry Cookie Bars.  I found this recipe on the back of the box of the graham cracker crumbs when I made the disappointing Peanut Butter Cup Cheesecake.   At least one good thing came from that fiasco!  lol   I made these for my family for Valentines and were a huge hit!  They are so easy to make!!

IMG_2388

Magic Raspberry Cookie Bars

2 c. graham cracker crumbs

1/4 c. sugar

1/2 c. margarine or butter, melted

1 can (14 oz.) sweetened condensed milk

1 1/4 c. seedless red raspberry preserves

1 1/3 c. flaked coconut

1 c. chopped walnuts or pecans

In a small bowl, combine crumbs and sugar.  Add margarine or butter.  Toss until combined.  Press into bottom of 13x9 inch baking pan.

Evenly drizzle sweetened condense milk over crumbs.  Refrigerate for 10 minutes.  Spoon preserves over top.

Sprinkle with coconut and nuts.  Bake a 350°F for 25 to 30 minutes or until light brown.

Cool completely.  Cut into bars.  Store, loosely covered, at room temperature.

♥ ♥ ♥ ♥ ♥ ♥ ♥ ♥ ♥ ♥ ♥ ♥ ♥ ♥ ♥ ♥ ♥ ♥ ♥ ♥ ♥ ♥ ♥ ♥ ♥ ♥ ♥

If you would like to participate or see who else is participating in Colleen’s Kitchen Weekly Recipe Swap click on the picture below to take you to her blog.

Colleen'sKitchen

♥ ♥ ♥ ♥ ♥ ♥ ♥ ♥ ♥ ♥ ♥ ♥ ♥ ♥ ♥ ♥ ♥ ♥ ♥ ♥ ♥ ♥ ♥ ♥ ♥ ♥ ♥


I meant to share this picture with you in my last post but somehow it got left out.  I took this a day before we got hammered with mountains of snow!   Spring  IS around the corner!!  These are some of my daffodils popping up!  Yayyy!!!

IMG_2362 

Until Next Time . . . .Kris 


Friday, February 5, 2010

Peanut Butter Cookies And More

Tuesday was my daughter, Brittney’s, 24th birthday and we took her out for dinner to the restaurant of her choice. She chose to go to a place called Steak On A Stone. We had never been there before but a couple of people have told us how wonderful it was. Their specialty is having you cook your own meat on a stone that’s heated to 750°. You can choose steak, chicken, shrimp, scallops, duck, lamb chops, pork tenderloin and lobster tail and when the waiter brings it out to you, it’s already browned on one side and he does a demonstration on how you cook your food. He flips the meat over to brown the other side and then tells you to slice off and cook each individual piece to your preference of wellness. It was pretty neat!! Chuck and Justin got steak, Brittney got Shrimp and Kory and I opted to have a meal already cooked – she got a cheeseburger and I got Lake Perch. Sorry, but one of the reasons why I like dining out is because I don’t have to cook! lol I didn’t want to have to work at making my meal!!

♥ ♥ ♥ ♥ ♥ ♥ ♥ ♥ ♥ ♥

Instead of cake, Brittney found a recipe in the “Taste of Home/Healthy Living” magazine for Peanut Butter Cup Cheesecake. It looked delicious and the recipe was revamped to reduce calories and grams of fat by using fat-free and reduced-fat cream cheese. Now you’re talking!!! A decadent dessert without the guilt!! It smelled like heaven while it was baking and looked even more scrumptious after it was completely done!

Now let me ask you this.. . . doesn’t this look sinful?

peanut butter cup cheesecake

We eagerly awaited until it was time to sing “Happy Birthday” and cut into that yummy confection! With the anticipation of tasting the gooey peanut butter and the rich chocolaty goodness, we took a bite and we all pretty much had the same look on our faces – disappointment!! It had NO flavor!!! I couldn’t believe it! What a bummer!!

If you’d like to try it anyways, just click on the picture to take you to the web page with the recipe.

♥ ♥ ♥ ♥ ♥ ♥ ♥ ♥ ♥ ♥

I’m hoping to continue to participate in Colleen’s Kitchen Weekly Recipe Swap, although I can’t promise that I will be consistently posting each week, but I’ll post when I can. I think it is a fun way to share recipes and I’ve gotten quite a few good ones already! Thank you, Colleen!!

So this week, I would like to share with you a fabulous cookie recipe. Growing up, there was a woman in our small town that was a phenomenal baker and she posted several of her favorite recipes in our church cookbook. This is a basic peanut butter cookie recipe which is outstanding by itself, but I like to add chocolate and peanut butter chips. ( A girl can’t get enough chocolate!!) They have become a favorite in our household and especially with my kids’ friends! Whenever they have a get-together, my cookies are a definite request!

Peanut Butter Cookies w/Chocolate and

Peanut Butter Chips

1c. brown sugar

1 c. sugar

1 c. margarine

1 c. peanut butter

2 eggs

1 tsp. vanilla

3 c. flour

1 tsp. salt

2 tsp. baking soda

1 12 oz. bag chocolate chip

5 oz. (half of bag) Reese’s peanut butter chips

Preheat oven to 350°.

Cream margarine and peanut butter together. Blend in sugar and brown sugar. Add eggs and vanilla. Stir in flour, salt and baking soda. Add chocolate and peanut butter chips.

Drop by spoonfuls onto cookie sheet and bake 8-10 minutes or until nicely browned.

♥ ♥ ♥ ♥ ♥ ♥ ♥ ♥ ♥ ♥

If you would like to participate or see who else is participating in Colleen’s (And Baby Makes Five) Kitchen Weekly Recipe Swap, click on the photo below and it will take you to her blog.

Colleen'sKitchen

♥ ♥ ♥ ♥ ♥ ♥ ♥ ♥ ♥ ♥

Thank you for all the concern and “get well” wishes for my hubby. He went this past Monday and had his catheter removed. And let me tell you, what a world of difference that has made in his attitude!! I don’t want you to think he was crabby or anything, because he wasn’t! If anything, I was the one that was probably crabby! lol He got a clean bill of health and has no more weight restrictions but shouldn’t try to lift anything extremely heavy for a couple more weeks. He can go back to his usual activities and has been knocking himself out doing things around the house! The man has become a little busy body! lol

I think I mentioned before in an earlier post that we wanted to make new kitchen cupboards, but with the holidays and then his surgery, we just didn’t have time to make them. Well. . . . .since he’s feeling so energetic (lol), I just “kind of” mentioned something about them and he jumped right on the bandwagon with me and we’ve begun making them!! Yayy!! It’s going to get done in stages. We’re starting with the wall cabinets, for now, which will make the biggest difference. I have a “galley” kitchen and so my cupboard space is limited. Instead of the standard 30” high cupboards, like we already have now, we’re going to make them to go all the way up to the ceiling, which will give me a lot more cupboard space!! We have concrete countertops (surprise, surprise, since that’s what Chuck’s business is) which I absolutely love!! We’ll have to make new ones due to the fact that there’ll be a slight adjustment in the width of the base cabinets (I’ll explain that later) but it’s a little too cold out to mixing up concrete outside., so those will have to wait until warmer weather. I’ll post pics of the progress.

♥ ♥ ♥ ♥ ♥ ♥ ♥ ♥ ♥ ♥

Well, this post has become a little lengthy!! (Sorry, I have much to make up for!) And I need to bake some more cookies. Justin is having friends over, again, Saturday night after their Sweethearts Dance at the high school. We’re suppose to get a major snow storm tonight into tomorrow morning with a lot of snow accumulation. So I don’t now how big of a turn out he’ll have. The southern part of the state is expecting 6-8 inches while the farther north you go, the snow accumulation will be less. The amount of snow we’re suppose to get keeps changing - it’ll be anywhere from 2-6 inches. So I guess we’ll just have wait and see what we get by morning!

Until Next Time. . . . Kris

Sunday, January 31, 2010

Hello!! Remember Me?!!

Hello, Friends!!    I can’t believe how long it’s been since my last post!!  Almost a month!!  I promise I won’t let that much time pass between posts again! 

Chuck’s surgery went pretty well.  It was definitely rough the first week and a half.  He was very sore.  We weren’t expecting him to be as incapacitated as he was.  The urologist insisted that the inside of his cheek would hurt more than his “bottom”, but that certainly was not the case!  He was not allowed to sit for 2 weeks – he had to recline.  I had to help lift him off the couch or bed so that he didn’t put pressure on his bottom trying to get up.  Even though he’s allowed to sit now, he’s still a little tender and has to sit gingerly.  He ended up having a regular Foley catheter instead of through his abdomen and will finally get that removed tomorrow!  I think once that’s out, he’ll feel a whole lot better. 

Besides dealing with my hubby that first week, I had a family birthday brunch for Kory and Justin to prepare for at the end of the week.  I definitely missed having Chuck’s help!  We usually make most of the food the morning of the brunch, with the exception of the muffins and the coffeecake.  But since I had to do it all by myself, I made 4 kinds of muffins and 2 pans of coffeecake a couple of days before and threw them in the freezer.  On Saturday, after I took Kory to bowling and then picked up bagels and cream cheese from Panera’s, I made sausage, bacon, hash browns, regular pancakes, blueberry pancakes, French Toast Bake, chicken & broccoli  quiche, plain scrambled eggs and scrambled eggs with green pepper, onions, mushrooms and cheddar cheese.   I also baked 2 batches of brownies for our “create-your-own-sundae” bar and chopped some Snickers bars and crushed some Oreo cookies for toppings.  I didn’t get to bed until 11:30 and then got up at 5:00 on Sunday morning to do some last-minute cleaning and other preparations along with putting everything in the oven to warm.  I wasn’t sure how all of it would taste being made the day before, but it turned out pretty good.

We had 18 family members arrive at 11:00 and didn’t think they would stay too long because of Chuck not being up to par, but they stayed way longer than they normally do!!  They stayed until a little after 5:00!  Now don’t get me wrong, I enjoyed having their company and normally wouldn’t have minded them being there that late, but I was exhausted!!!  On top of that, since the kids didn’t have school on Monday, Justin was having 6 or 7 friends over later that night.  They love my peanut butter cookies with chocolate and peanut butter chips and I promised Justin that I would make some for them.  Well, I was still baking cookies when the kids started showing up.  And the number of kids went from 6-7 to 28!!!!  Chuck ended up going to bed around 8:30 - he was worn out and in a lot of pain.  I wanted to go to bed so bad, but I felt I should stay up until the kids left, which, surprisingly, was 11:30.  I thought it would be much later than that and so glad that it wasn’t!!   Come Monday, I stayed in my jammies all day and didn’t do a darn thing!!  It still took me a couple of days after that to get back to “normal”, if there is such a thing!  lol 

I then went through a period of “winter blues”.  I think it was a combination of being cooped up at home trying to keep Chuck company since he couldn’t do much (and to keep him from doing things he wasn’t suppose to) and the fact that we didn’t have very many days of sunshine.  Our local weatherman stated a couple of days ago that since November 1st we’ve only had 17 days with sunshine! ( I think were up to about 19 now).  We even had a week of fog lasting all day – the temperatures were rising into the 40’s with snow still on the ground creating the fog.  Talk about gloomy!!  I was in such a frumpy mood.  I had no desire to be creative and didn’t even get on the computer for several days.  And what’s even more amazing. . . . . Chuck gave me a gift certificate to one of my favorite prim shops, Primitive Keepings, and I had NO desire to go use it!!  What’s wrong with me?!!!  lol

Luckily, things are looking a little brighter.   Chuck’s feeling much better and almost back to his old self, with the exception of not being able to lift anything over 20 lbs until the end of February.  He’s gotten out a couple of times with me, but feels self-conscious of his catheter bag.  As I said earlier, he’ll get that removed tomorrow and then he’ll feel much better.  This has been hard for him – he’s not used to being cooped up and not able to do anything.  He’s going stir crazy!  The only bright side is, is in the last 3 weeks, he was able to read the four books that he got for Christmas.  One of them is Stephen King’s new book,  Under the Dome, which has 1,072 pages.  Now that’s being laid up!!

blog 002

I’ve been trying to “think spring” and have a few projects brewing in my head, so that’s helped lift the winter blues a bit.

************************

I know I’m way behind and that a lot of you have probably put your snowmen decor away, but I wanted to share this snowman with you.  I bought him several years ago at a craft show and thought it was a very clever idea!  He’s made out of an old cooking pot lid!  The woman that made him said she bought the lids at Goodwill – each one had a different shaped nose due to the handle style.  Isn’t that clever?

blog 001

************************

Do any of you notice the resemblance of my blogger background to this picture?

soap_dish_004[1]

Yep, it’s my wallpaper!  I had a piece left and scanned it on my computer.  I’ll share more on exactly how I did it at a later date!

************************

I’m excited to announce that I’m the new Prim Project Coordinator for A Primitive Place!!  Each month I will do a craft tutorial exclusively for APP.  I won’t be posting it on my blog, you’ll only be able to see it by visiting A Primitive Place.  Click on the picture below to check out this amazing forum! 

A_primitive_Place[1]

My first tutorial is how to make an Artificial Prim Tree.

 #1 #2


************************

Until Next Time. . . . Kris

Thursday, January 7, 2010

Just Checking In!!

Hello, friends!!  I’m just checking in to let you know that everything is fine and that I’m not giving up blogging!!  Thanks to all of you who were concerned and have emailed me to make sure I’m alright!

I spent the last couple of weeks being extremely lazy and enjoyed spending time with my family.  My kids are older and at the “moving out” age, so I want to spend as much family time as I can.

This month is going to be a busy one for me, so I still may not be blogging much.  Kory’s birthday is today (she turns 21) and Justin turns 18 on the 21st.  On the 17th, we’re having about 18-20 family members over for a birthday brunch.  Chuck usually does a lot of the cooking – scrambled eggs, hash browns, bacon and sausage – but this year he may not be up to par to help me much!! 

On Tuesday, the 12th, my hubby is scheduled to have surgery at the Cleveland Clinic.  He has scar tissue built up in his urethra and has had problems urinating for the past several years.  He has had times when urinating has slowed down to a trickle and a couple of times, has come to a complete stop.  The poor man has had to go to his urologist about every 3 months to get “reamed” open for too many years.  They finally convinced him that surgery is his only option.  After they remove a 4-5 cm section of his urethra, they’ll take skin from the inside of his cheek to make a new replacement.  He’ll have to have a catheter inserted through his lower abdomen and have that for about 3 weeks until everything is healed.

My Mom and Dad made their rounds right after Christmas visiting me and my 4 siblings to tell us that my Dad has prostate cancer.  He’s 75 and considered too old to have surgery, which he would have refused anyways, because he and my mom have the belief that “once they cut you open, the cancer will spread”.   He’ll have radiation treatments 5 days a week for 8 weeks.  He has an appointment next week with an oncologist to find out when he’ll have to start the radiation.  They’re both still very active and independent – also stubborn enough to refuse any help offered!  My dad ordered hardwood flooring to replace the carpet in their Great Room a couple of days after he found out he had cancer and insists on installing it himself!  It may be a good project to keep his mind busy, but he also has a tendency of doing more than he can handle and won’t admit when he needs help.

My busy month ends with my daughter, Brittney, turning 24 on Feb 2nd.  Hopefully, after that, I should get back to blogging on a normal basis!   Please be patient with me!!  I miss all of you and look forward to being in touch with you soon!!

Until Next Time. . . .Kris

Wednesday, December 23, 2009

Merry Christmas!!!

I’d like to wish all of my friends

A    VERY

MERRY CHRISTMAS!

607823


Friday, December 18, 2009

Christmas Breakfast Recipes & Family Room Pics

Happy Friday, friends!!  Are you all ready for Christmas?!  I’m happy to say that everything is falling into place at my house!!  I still have cookies to bake, which I’ll do on Monday.  I don’t like to make them too far in advance, otherwise, they’ll be gone before Christmas!!  Other than that, I’m ready!!

Today is the last day of school for Kory and Justin and so it’ll be nice to have the next week to be able to relax by a fire and spend some quality family time together watching movies and playing games.   We even have snow in the forecast!!  We’re suppose to get up to 2” tonight and on Christmas Eve there’s a 60% chance of some major accumulation!!  Perfect to snuggle up in front of a warm fire on Christmas Day, especially since we don’t have to go anywhere!!

We have a few activities this weekend to attend to.  Kory has bowling in the morning and then Saturday evening, we have a 50th birthday party for my brother-in-law to go to.  On Sunday afternoon, my Mom and Dad are having our family  get-together.  So that’ll be fun!

chrbrd    Here are a couple of recipes that we like to make and enjoy Christmas morning after all of the presents have been opened.   I hope you enjoy them, too!

Cream Cheese Coffeecake

Batter:

1/2 c. butter, softened

8 oz. cream cheese, softened

1 1/4 c. sugar

2 eggs

1 tsp. vanilla

1 1/3 c. flour

1 tsp. baking powder

1/2 tsp baking soda

1/4 tsp. salt

1/4 c. milk

Topping:

1/3 c. flour

1/3 c. brown sugar

1/2 tsp. cinnamon

2 T. butter, softened

Preheat oven to 350 degrees.

Cream butter, cream cheese and sugar together.  Add remaining ingredients.  Pour into greased 9x13 pan.

Mix topping ingredients together; mixture will be crumbly.  Sprinkle onto batter.

Bake 35-40 minutes.  Let cool.

Breakfast Pizza

1 lb. Italian sausage

2 c. bisquick

1/2 c. water

1 c. frozen hash brown potato cubes

1 c. shredded cheddar cheese

3 eggs

2 T. milk

1/2 tsp. salt

1/8 tsp. pepper

Preheat oven to 400 degrees.

Brown sausage; drain.  Mix bisquick and water; press onto bottom and up sides of an ungreased 9x13 pan.  Spoon sausage over crust.  Sprinkle with potatoes and cheese.  Beat eggs, milk, salt and pepper and pour over top.

Bake 20-25 minutes.

chrbrd

As always, if you’d like to see who else is participating in Colleen’s (And Baby Makes Five) Homemade Holiday Recipe Swap click here:

homemadeholidays2

chrbrd

I wanted to share with you a picture of a cupboard my hubby and I made for my sister to give her granddaughter for Christmas.  This thing is huge!  She has a couple of American Girl dolls and my sister wanted us to make something for her to store the dolls in, along with all of the doll clothes and accessories.   My sister is going stencil something on the front of the doors and make liners for the baskets to give it a little color! (You can’t see it, but there’s another rod at the very top on the right side to hang clothes on.)

IMG_2184

chrbrd

Okay, before you see these next pictures, I want to explain a few things.   First off, I’m sorry they’re dark.  My family room is in the basement and doesn’t have any windows so the lighting is very poor.  I’m enabling it so that if you click on each picture, you should be able to see a larger view. (But don’t look too closely!  lol)

The couch and chair definitely clash with the plaid wallpaper (check out the pillows on the couch).  When we got new furniture for the living room a couple of years ago, some of the old pieces came down here.  We put a slipcover on the couch, but I never got around to getting one for the chair,  so a sheet got thrown over it, which helps a lot when Sam, our Dalmatian, rubs up against the front and leaves dog hair all over it!  Even tough it’s not very pretty, it’s easy to take off and throw in the wash.

Eventually, we’ll get new furniture and new carpet and redo the ceiling tile by raising it up a couple of inches and installing smaller 2’x2’ squares.  We’ll also put in recessed lighting to brighten things up a bit.

As far as the decor, I really haven’t put to much effort into decorating down here.  Everything is pretty much odds and ends from upstairs that I don’t know what to do with. 

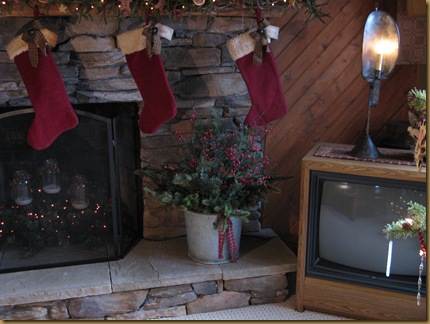
My hubby did the Christmas decorations.  While I was busy doing the upstairs, he took the things that I decided not to use and placed them down here.  I usually have the garland, the stockings (that’s where Santa leaves the treats for the pets) and the tree, but not much else. 

IMG_2171

This is Sam.  I gave up trying to get him to move, he was way too comfy!!


IMG_2167

It’s not a very good picture, but, the TV stand was made using 3 ready-made cupboards from Home Depot.  We attached them together, put sides and a top piece on, and then painted.  The middle door holds our satellite receiver, Wii and Xbox 360 consoles, and the VCR/DVD player.  The other cupboards hold DVDs and video games.

IMG_2168

IMG_2174

On the top of the cupboard is my collection of Byer’s Choice “A Christmas Carol” figurines.  I usually have them upstairs, but since I’ve rearranged things, they didn’t work in the place I usually put them.


IMG_2178

IMG_2180

This heads into the Rec room, which I had posted pictures of earlier.

IMG_2183

The door you see in this picture leads into the utility room.  One day, when I get really, really brave, I’ll post show you pictures of it.  This is were Sam stays at night and while we’re away.  And also where Chuck comes in after work covered in concrete dust and muddy boots with stones stuck on.  On the extreme right, behind the pole, are the stairs leading up to a side door and then into the kitchen.

chrbrd

I mentioned in my last post that I was working on another Santa.  I love the ones that Druann makes and sells on her PictureTrail – Cinnamon Creek Cabin and the ones that Stacee makes and sells on her Picture Trail – Arnett’s Country Store.  I haven’t been fortunate to be able to purchase one of theirs, yet (I keep trying!!),  so I decided to try to make one of my own!  It’s definitely not as nice as theirs, but it turned out okay.  I didn’t have any patterns to use, so I had to create my own. I just kind of “winged it” as I went along.  I have a lot of tweaking to do!   I need to revise the pattern for the pants, because these make him look bowl-legged!!  lol   I’m not sure how I’m going to finish him off, yet, but I’m not going to worry about it until after Christmas.  I actually don’t even know where I’m going to put him!!  lol  He was kind of fun to make!  I’ll probably try to make more and experiment with other techniques, again, after the holidays!!

IMG_2192

chrbrd

I hope to be back and do one more post before Christmas – I have a few more things that I’ve made and want to share them with you. . . but, in case I don’t, I want to wish all of you a very Merry Christmas and I hope that the time you get to spend with loved ones is a very memorable one and that Christmas turns out to be everything you’ve dreamed it to be!!

Merry Christmas!!!


Until Next Time. . . .Kris


Wednesday, December 16, 2009

A Few More Christmas Decorations

Happy Wednesday, everyone!  I hope everyone is well!  I feel like I’ve missed so much!! I forced myself to stay off of the computer for a few days so that I could get some stuff done before the holidays and be able to have the week before Christmas to just relax and spend time with my family.  You don’t know how hard it was to keep from popping in to read everyone’s blogs or visit a couple of social forums that I belong to.  But, my efforts paid off – I’ve gotten a lot of things done.  My house is all clean and decorated for the holidays, Christmas cards have been mailed, a few appetizers for Christmas eve are made and in the freezer, presents are all wrapped and everything I need for our Christmas eve get-together and for our Christmas day breakfast and dinner are all bought.  I’m all set – so bring on Christmas!!  lol

I have so much to share with you!  This post is a little lengthy and definitely laden with pictures!! First of all, last Monday my hubby and I made a quick trip to Amish country.  One of the little shops had a flyer laying on the checkout counter announcing a Christmas Open House at Ragon House that would be open to the public.  It was being held for 3 weekends, with this past weekend being the final one.  Most of you may be familiar with the many Belsnickle santas that they carry.  You can check out their website by clicking here.They’re located in Bolivar, which is about an hour away from me.  My hubby and I went Saturday morning and OH. . . MY. . . .GOODNESS!!!!!!  When I walked in the door, I literally went giddy!!  It was prim heaven!!  They had so much stuff and it was all marked down 50% off PLUS another 35% was taken off at the register!!  I could have gone crazy and bought a lot more than what I did, but I contained myself and was a good girl!!

A girl at the checkout said that this was the first time the have done a Christmas open house.  They usually hold one in May.  Let me just say that I’m definitely saving my pennies for that one!!!

Here are my goodies:

IMG_2081

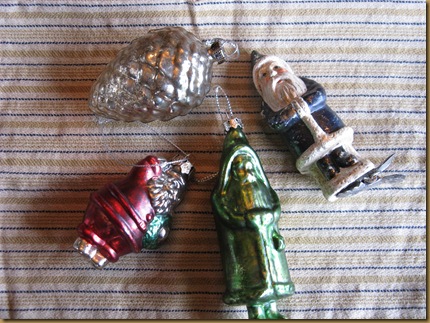
These ornaments were marked down to $2.00 and $3.00 PLUS the additional 35% off!

IMG_2150

This lantern is about 15-16” tall and was marked down to $8.75.  I don’t really care for the color, but at that price, I’ll paint it!

IMG_2088

I bought the santa on the left at the store in Amish country that had the Open House flyer for $18.95.  The larger santa, which stands about 16” tall, came from  Ragon House.  It was marked down to $17.50, but I got him for $11.38!!!  Can you believe it?!!

And now for the final item! My hubby was excited about this one, too!  Are you ready?!!

IMG_2133

This fabulous guy was marked down to $48.00 and I got him for $31.20!!!!  The picture doesn’t do him justice!  I absolutely love him!!

chrbrd


When I decorate for a holiday, it usually entails making a few things.

Here’s some pictures of a couple of santas that I made.


IMG_2154

I found the pattern for this guy at Patternmart.com.  It’s a free epattern so if you’re interested, click here to take you to the web page to download the pattern.  He’s about 37” long.  I think his clothes are too big on him, especially the pants, so I’ll probably remake some new ones later.  They don’t look that big on the model santa, but mine are huge!!  lol

IMG_2104

This one is my favorite, although, it’s not a very good picture of him!  His pattern was in the Create & Decorate magazine from a couple of years ago.

I have another santa that’s in the works. . . I hope he turns out the way I’m envisioning him.  I’ll share him with you later.

chrbrd


Here are a few more pictures of my Christmas decor.

IMG_2082

IMG_2090

IMG_2094

IMG_2096

IMG_2098

IMG_2102

IMG_2107

 IMG_2109

IMG_2116

IMG_2118

Did you notice my stockings are different than the ones posted in earlier pics?  I was tired of the cross stitch stockings that I made about 20 years ago.  Last year, I made these and hung them, but this year I felt kind of guilty and put the cross stitch ones back out.  After a couple of days, though, I decided to hang these back up instead.  The cross stitched ones, I think, looked busy.

IMG_2119  IMG_2125

IMG_2132

I like to use mixed nuts (in the shells) to toss into my fruit centerpiece to use as a filler in the nooks and crannies.  I usually only find them this time of year in the produce section at my local grocery store by the bulk.

Save the Brazilian nuts and paint them to look like watermelons to use as bowl fillers in the summer.

IMG_2160

IMG_2135

This door is to a food pantry.  This is where I hang my Christmas cards.  I used to put them in a basket, but they seem to get looked at more hanging here. Our advent wreath also hangs on this door.  I started this years ago when my kids were small.  I bought 24 little ornaments and keep them in a little basket, which sits on a table to the left of the door.  My kids take turns hanging an ornament on the wreath every day until Christmas.  And even though they’re 18, 21 and 24 years old, they still like to hang the ornaments!

Do you see this guy?

IMG_2158 My opinion is that this ornament shouldn’t be hung until December 24th and every year, some one tries to pull a fast one by hanging it before that day.  Last year it went unnoticed for a couple of days.  Every once in a while I count the ornaments to make sure the correct number is up there.  One day Brittney and Justin were standing nearby, giggling, which made me suspicious, so I took a closer look and discovered that my son had hung the Dec. 24th ornament under the bow so it couldn’t be seen!  He said it had been there for a couple of days and I never knew it!!  The little stinker!!  This year, Justin is excited because it works out that he will get the honors of hanging that ornament on the 24th.  Sometimes, you just never grow up!!  lol

IMG_2145

IMG_2147


chrbrd


The other day, I received a nice surprise in the mail from Colleen (And Baby Makes Five). She sent me some of her homemade Mini Cinnis and Cinnamon Gingerbread boys, plus a homemade “Joy” sign and a “Sugar Cookie” Yankee Candle votive.  Thank you so much, Colleen!!   You are such a sweetie!!  I was so involved with the hustle and bustle of the holidays and this was a wonderful little reminder of what Christmas is all about.  You are such a warm and caring friend!  Thank you, again!

IMG_2156

chrbrd

Thank you for taking the time to stop by – I really appreciate it!

Please check back on Friday for a couple of recipes that my family likes to make for breakfast on Christmas morning. Plus, possibly some pictures of my family room decorated for the holidays.

Until Next Time. . . .Kris

LinkWithin

Blog Widget by LinkWithin